Inkscape Tutorial for Beginners

Inkscape is a free and open-source vector graphics editor; it allows creating or editing of vector graphics, including illustrations, diagrams, line arts, charts, logos, and complex images. Scalable Vector Graphics (SVG) is Inkscape’s primary vector graphical format. However, several other formats can be imported and exported.
The software is available for all three platforms viz. Windows, Linux and Mac.
Software Download link: Download Inkscape 1.1 | Inkscape
The installation part is pretty straightforward, just clicking the next …next will install the software.
This Inkscape tutorial is for beginners who want to get started with Inkscape. Inkscape has lots of features and options available. This tutorial consists of information regarding basic tools, boolean operations and image tracing.
Let’s start the Inkscape tutorial!
For beginners who just delve into CAD modelling and searching for suitable CAD software, you may like to know how to Download SolidWorks for Free and Install on Your PC.
Welcome screen and user interface
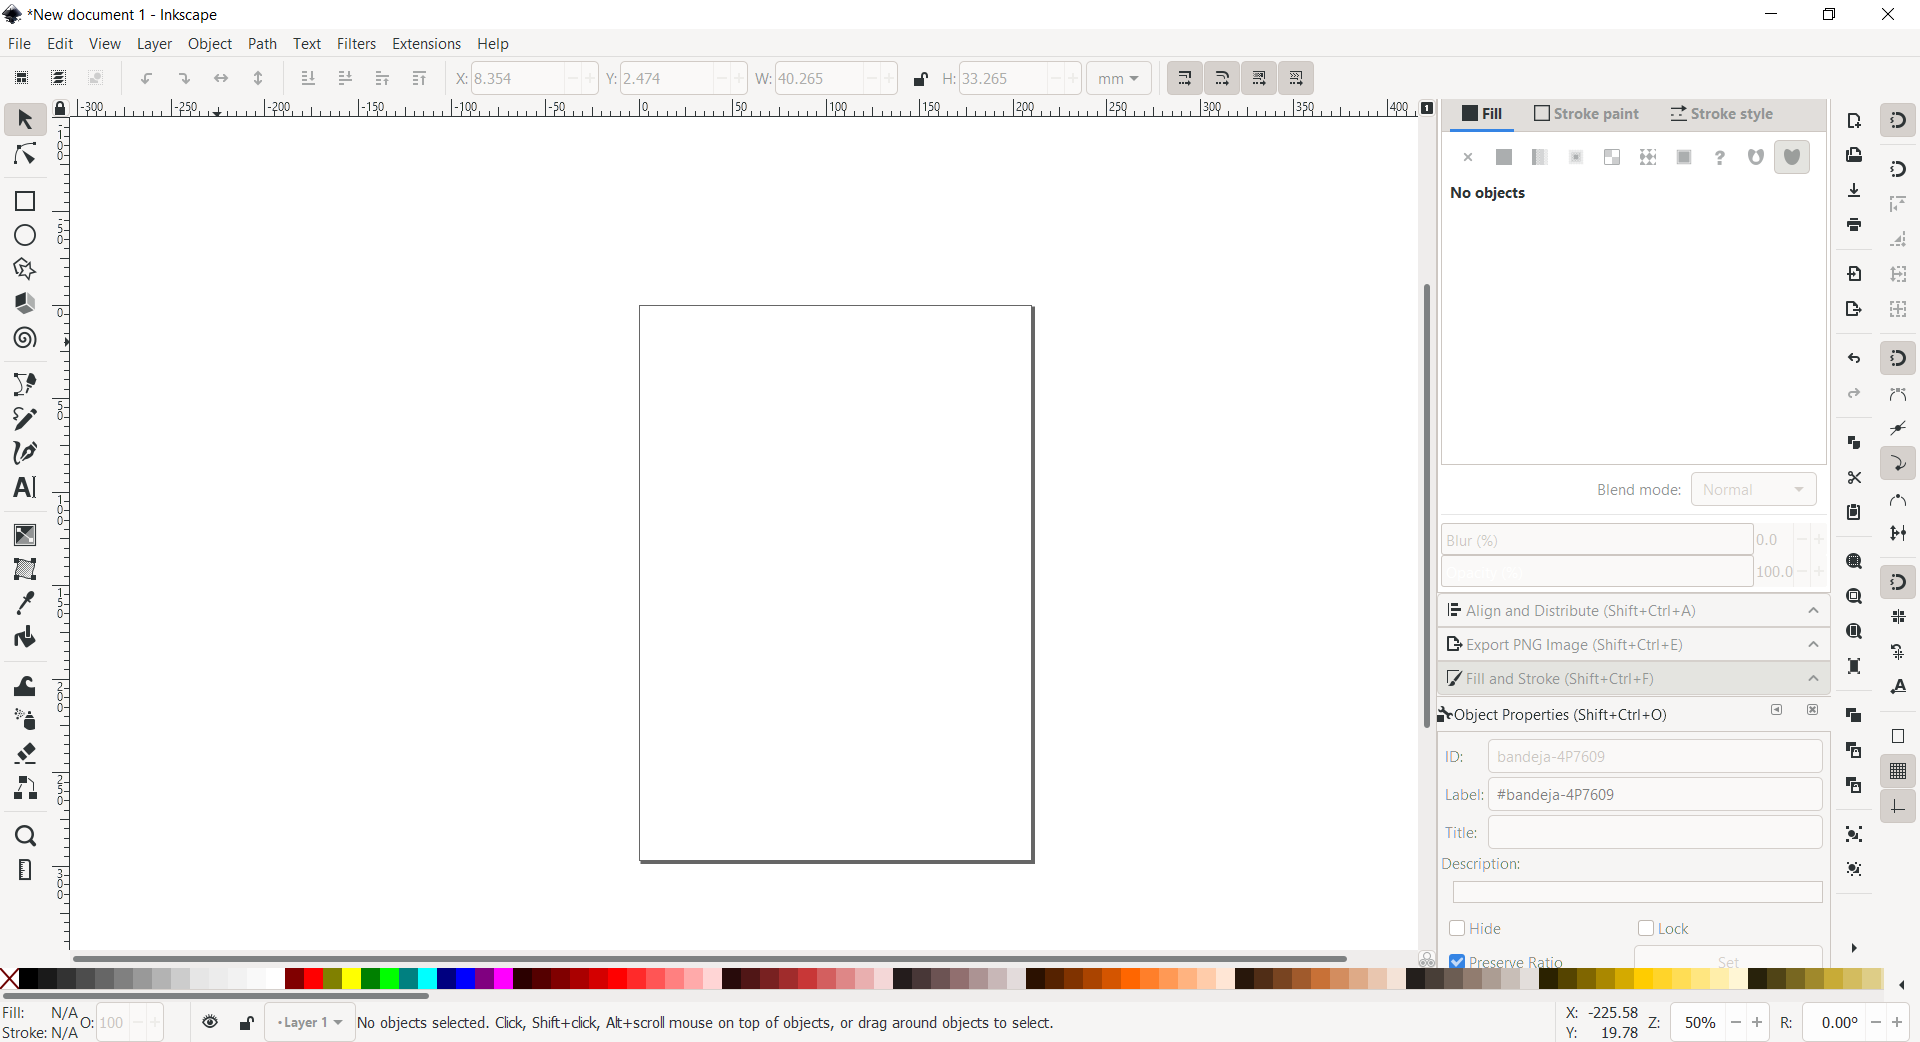
If you open the software after the installation, you will see a Menu bar with standard options as much other software, some designing and editing tools on the left side, a colour palette on the bottom, some more options on the right side and a white canvas in the middle with a page border.

You can customize the interface as you wish. You can change themes, shortcut keys, tools position, etc. using Edit >> Preferences.
In this Inkscape tutorial, one thing that I recommend to streamline your workflow is to set or pin some frequently used features on the right side. For example fill and stroke, align and distribute, layers and exporting design to png.
Let’s look into how we can do that.
Fill and stroke: You can go to Object in the menu bar located at the top and click Fill and stroke or simply use the keyboard shortcut Shift+Ctrl+F
Align and Distribute: You can go to Object in the menu bar located at the top and click Align and Distribute or simply use the keyboard shortcut Shift+Ctrl+A
Layers: You can go to Layer in the menu bar located at the top and click Layers or simply use the keyboard shortcut Shift+Ctrl+L
Export PNG: You can go to File in the menu bar located at the top and click Export PNG Image or simply use the keyboard shortcut Shift+Ctrl+E
Controls and shortcut keys
We use features like zoom in and out, pan, move right and left, etc. extensively during the design process. Therefore, knowing the shortcut to do such operations will make the design process a whole lot easier.
Zoom: The easiest way to Zoom in and out is by pressing + and – keys on your keyboard. The other way is to hold the Ctrl key and scroll backwards and forward to Zoom in and out.
Pan: There are many ways to pan(scroll) the document canvas. You can use Ctrl+arrow to scroll by keyboard or just press the scroll button and drag the canvas using your mouse. If you want to scroll horizontally, you can use Shift with the scroll wheel.
Creating and managing documents
To create a new empty document, use the File option from the menu bar and click New or press Ctrl+N
To open an existing SVG document, use the File option from the menu bar and click Open or press Ctrl+O
To save your document, use the File option from the menu bar and click Save or press Ctrl+S, or File >> Save As (Shift + Ctrl + S) to save under a new name.
Inkscape may be unstable sometimes, so remember to save often!
Inkscape Tutorial on Creating shapes, transformations and features
Let’s delve into the Inkscape tutorial to make some nice shapes!
Rectangle: Click on the Create Rectangle and Square tool in the left side toolbar or simply press the R key on your keyboard. Now click and drag on the canvas.
Default rectangles come up blue, with a black stroke (outline), and are fully opaque.
You can adjust the size of a rectangle from the command bar below the menu bar by simply putting width and height as you wish. Or click the Select and transform object from the left side toolbar or simply press the S key on your keyboard and click on the rectangle and adjust the size from the side or corner.
Square: Select the same tool as Rectangle and hold Shift + Ctrl and click the mouse and drag on the canvas. Or click and drag randomly on canvas and insert equal size on width and height.
Radius corners: By default the corner of the rectangle and square is normal but if you want to give some radius to the corner, you can do so by adjusting the small circle on the top right corner after you drew the rectangle or square.
Fill colour: Select the object you drew and choose any colour you want from the colour pallet located at the bottom. If you want no colour fill, click cross which is in the first option available in the colour pallet.
Gradient Fill: Select the object you drew and on the right side go to the Fill and Stroke >> Fill >> Linear Gradient. You can see a horizontal line with circles at the end on the object you selected. Click the small circle on the horizontal line one by one and select your colour.
Stroke Colour: Select the object you drew and hold Shift on your keyboard and choose any colour you want from the colour pallet located at the bottom. If you want no colour stroke, hold Shift and click cross which is in the first option available in the colour pallet.
Stroke Width and style: Select the object you drew and on the right side go to Fill and Stroke >> Stroke style option. From there you can increase or decrease the width of the stroke and also change the dashes style.
Opacity: Select the object you drew and adjust the opacity level from the option located at the bottom below the colour pallet.
Ellipses, Circle and Arcs: Click on the Create Circle, Ellipses and Arcs tool in the left side toolbar or simply press the E key on your keyboard.
After selecting the tool, if you click and drag then you can create an ellipse.
If you hold Shift + Ctrl on your keyboard and left-click and drag, you can create a circle.
Once you create a circle, a small circle in the middle of the right side appear, clicking and dragging that circle along the circumference will allow you to create an arc.
Star and Polygon: Click on the Create Stars and Polygons tool in the left side toolbar or simply press the * key on your keyboard.
After selecting the tool, if you click and drag then you can create a star. You can change the number of corners, spoke ratio, etc. from the command bars.
You can create a polygon by selecting the regular polygon option. You can select any number of corners above 3, change spoke ratio, rounded corners, etc.
Spirals: Click on the Create Spirals tool in the left side toolbar or simply press the I key on your keyboard. After selecting the tool, if you click and drag then you can create a spiral. You can adjust turns, divergence and inner radius from the command bar.
Freehand lines: Click on the Draw Freehand lines in the left side toolbar or simply press the F6 key on your keyboard. After selecting the tool, if you click and drag then you can create a shape you want. You can adjust smoothness, shape, etc. from the command bar.
Bezier Curves and Straight Lines: Click on the Draw Bezier Curves and Straight Lines in the left side toolbar or simply press the Shift + F6 key on your keyboard. After selecting the tool, if you click on one point and on another, you can make straight lines. For curves, you should click and drag. You can adjust the shape from the command bar.
Text Objects: Click on the Create and Edit Text Objects in the left side toolbar or simply press the F8 key on your keyboard. You can see a textbox with the cursor where you can type your text. You can change font type, font style, font size, letter spacing, line height, etc. from the command bar.
Boolean Operations

Union: You can go to the menu bar and select Path option and select Union or simply use shortcut keys Ctrl++ from your keyboard after selecting two objects. This option will merge two shapes into one.
Difference: You can go to the menu bar and select Path option and select Difference or simply use shortcut keys Ctrl+- from your keyboard after selecting two objects. This option will remove the overlapping part and shape of the second shape.
Intersection: You can go to the menu bar and select Path option and select Intersection or simply use shortcut keys Ctrl+* from your keyboard after selecting two objects. This option will remove all shapes except the overlapping part.
Exclusion: You can go to the menu bar and select Path option and select Exclusion or simply use shortcut keys Ctrl+^ from your keyboard after selecting two objects. This option will remove the overlapping part but preserve the non-overlapping part between two shapes.
Division: You can go to the menu bar and select Path option and select Division or simply use shortcut keys Ctrl+/ from your keyboard after selecting two objects. This option will divide the main shape into a number of parts based on the second shape.
Cut Path: You can go to the menu bar and select Path option and select Cut Path or simply use shortcut keys Ctrl+ Alt + / from your keyboard after selecting two objects. This option will cut the bottom object’s stroke and remove any fill. (this is convenient for cutting fill-less strokes into pieces).
Curved Text
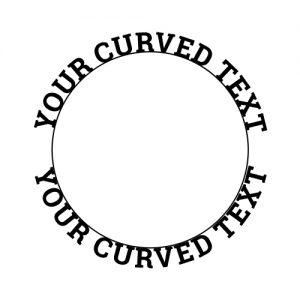
You can make your text bend according to the shape of the curve. For example, you have a circle and bend text outside or inside its circumference.

Click on the Create Circle, Ellipses and Arcs tool in the left side toolbar or simply press the E key on your keyboard.
If you hold Shift + Ctrl on your keyboard and left-click and drag, you can create a circle.
Give a stroke with some width and remove the fill.
Click on the Create and Edit Text Objects in the left side toolbar or simply press the F8 key on your keyboard. You can see a textbox with the cursor where you can type your text.
Now select both circle and text using the select and transform objects tool.
Go to the Text option in the menu bar and select Put on path.
It will bend your text and put it on a circular path. You can rotate the circle to adjust the positioning of the text. If you delete the curve, it will unbend your text or make it a normal straight text. So to avoid that, you should select the text and go to Path option and select Object to Path. Now even if you delete the curve, the text will remain as it is.
Inkscape Tutorial on Tracing Bitmaps
in this Inkscape tutorial, I would like to mention the tracing feature that will allow you to trace bitmaps (jpg, png, jpeg, etc.) and convert them to a vector file (SVG) which you can edit and modify. For a simple design, it will reduce your time and effort.
Let’s see how we can use this feature.
Pull your desired design from the internet to your local machine and import it into Inkscape.

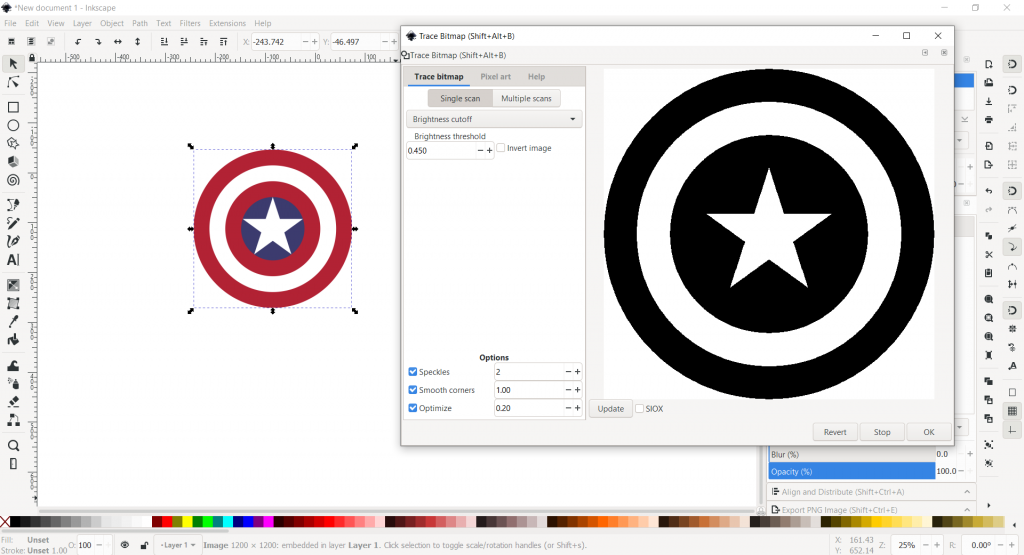
Once imported, select the image and go to Path option from the menu bar and select Trace Bitmap. It will open the Trace bitmap dialogue box.
There are two primary options – Mode and Options
Under Mode option, there are again two options single scans and multiple scans
Single scans are mainly for black and white tracing while multiple scans are for colour tracing.
Brightness cutoff will trace an image based on the brightness in the image that needs to be traced. In most cases, the default value will work.
Edge detection will trace the edges of an image. You can adjust the threshold till you get satisfied with the tracing.
———-
The Inkscape tutorial has ended here. You can find many videos on youtube if you want to learn more about the program.

Bipin Sharma is an Energy Systems Engineer. He cherishes, sharing his knowledge with other people. For the latest updates from him, subscribe to AcadBuddy. Do not hesitate to drop a message.

Thank you for the tutorial.